基本概念
见P2Tree大佬的文章
https://zhuanlan.zhihu.com/p/140462815
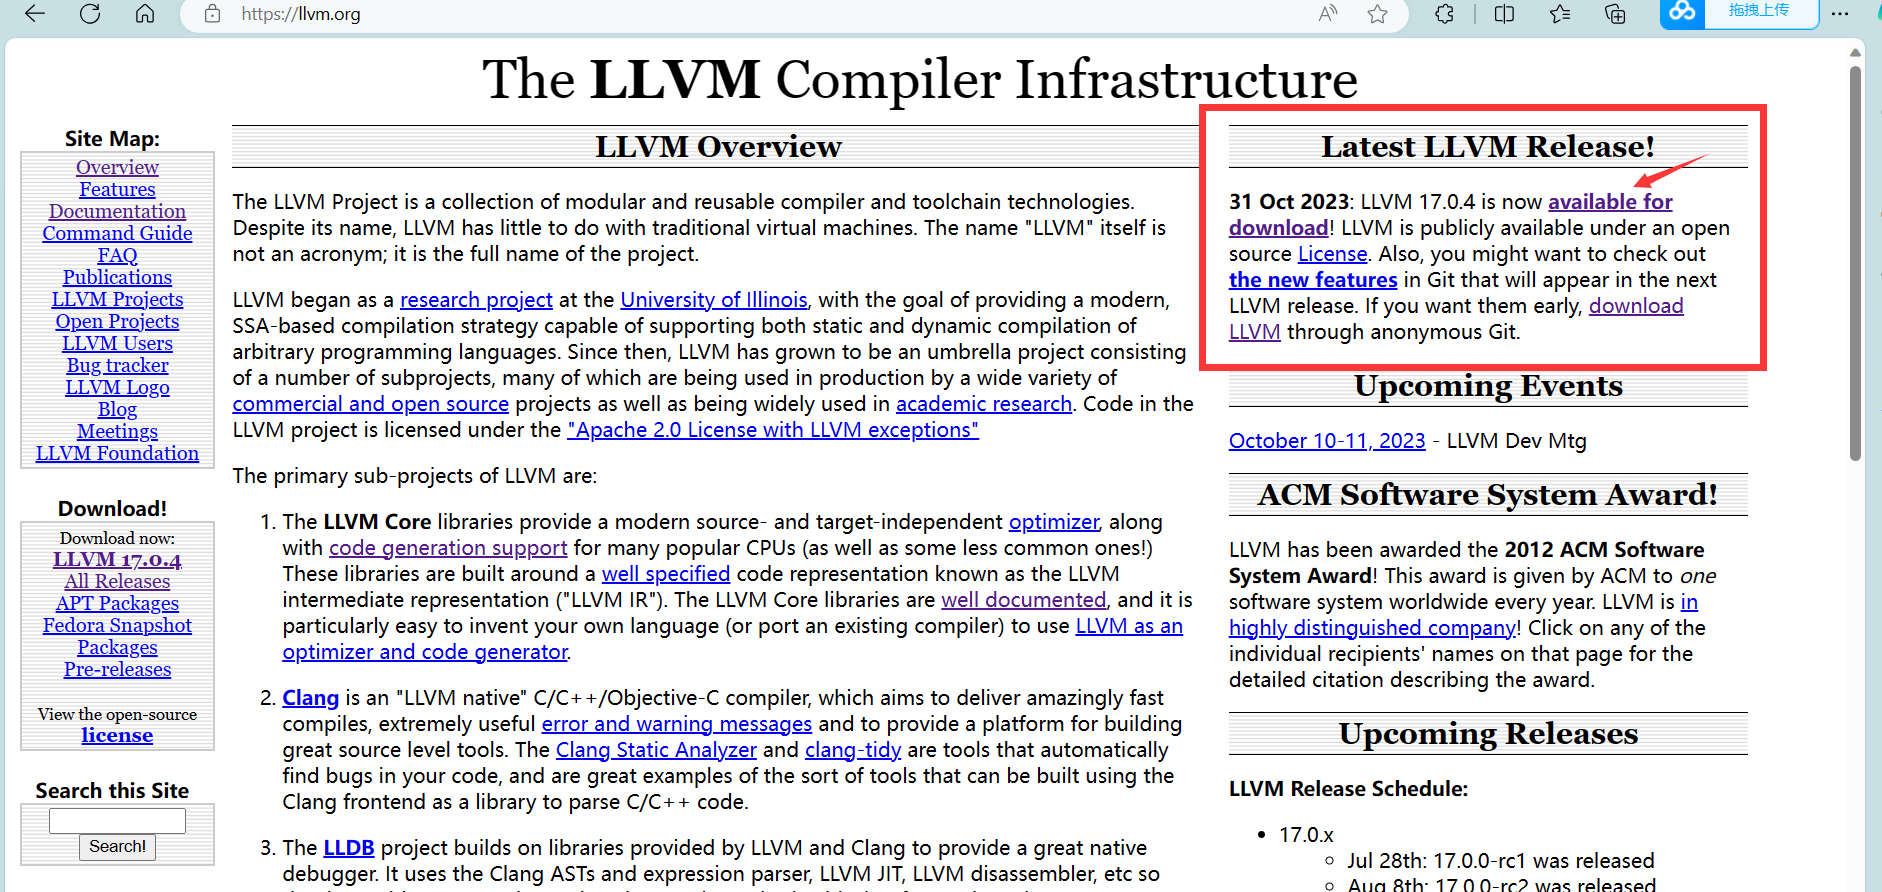
官网
https://llvm.org/
The LLVM Project is a collection of modular and reusable compiler and toolchain technologies. Despite its name, LLVM has little to do with traditional virtual machines. The name "LLVM" itself is not an acronym; it is the full name of the project.
编译llvm
下载源码9.0.1
源码:https://releases.llvm.org/
选择9.0.1的
vmware+ubuntu20.04
//修改时区
sudo timedatectl set-timezone Asia/Shanghai
vscode+clion
编译和调试需要用到
clion编译llvm
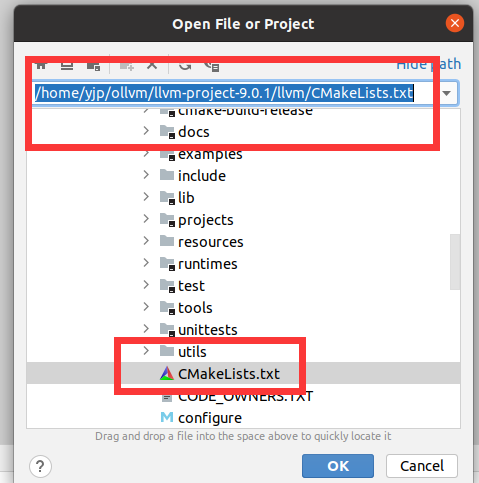
1.使用clion选择CMakeLists.txt
2.配置cmake
如下图
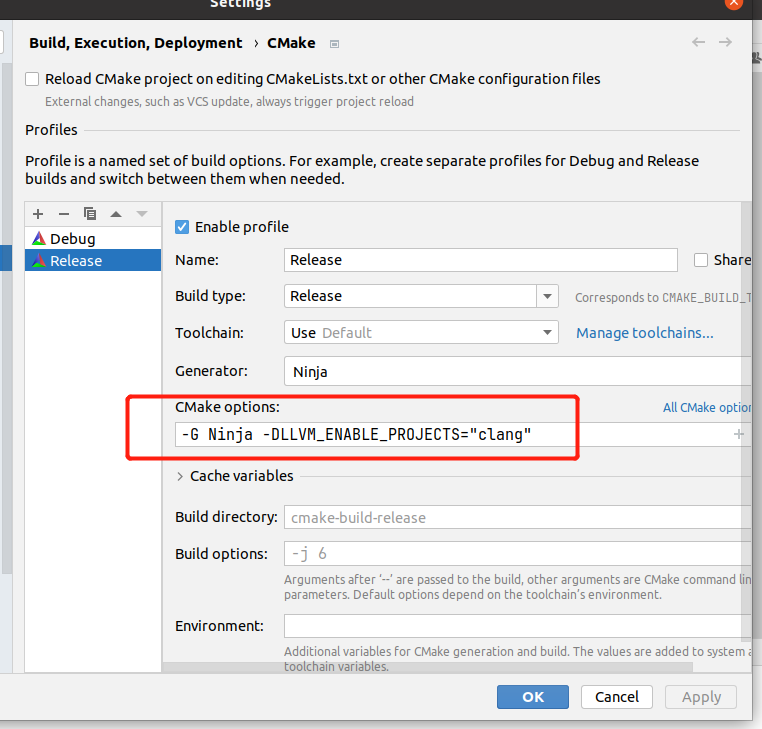
3.ninja -j8

基本使用
hello_clang.c
#include <stdio.h>
int main(){
    printf("%s","hello clang\r\n");
    return 0;
}
yjp@ubuntu:~/Desktop/c_code$ export PATH=/home/yjp/ollvm/llvm-project-9.0.1/llvm/cmake-build-release/bin:$PATH
yjp@ubuntu:~/Desktop/c_code$ clang
clang-9: error: no input files
yjp@ubuntu:~/Desktop/c_code$ clang hello_clang.c -o hello_clang
yjp@ubuntu:~/Desktop/c_code$ ./hello_clang
hello clang
yjp@ubuntu:~/Desktop/c_code$ clang -emit-llvm -S hello_clang -o hello_clang.ll
clang-9: warning: hello_clang: 'linker' input unused [-Wunused-command-line-argument]
clang-9: warning: argument unused during compilation: '-emit-llvm' [-Wunused-command-line-argument]
yjp@ubuntu:~/Desktop/c_code$ clang -emit-llvm -S hello_clang.c -o hello_clang.ll
yjp@ubuntu:~/Desktop/c_code$ lli hello_clang.ll
hello clang
yjp@ubuntu:~/Desktop/c_code$ llvm-as hello_clang.ll -o hello_clang.bc
yjp@ubuntu:~/Desktop/c_code$ llc hello_clang.ll -o hello_clang.s
yjp@ubuntu:~/Desktop/c_code$ which clang
/home/yjp/ollvm/llvm-project-9.0.1/llvm/cmake-build-release/bin/clang
pass编写
https://zhuanlan.zhihu.com/p/122522485
1.创建一个目录
在lib->Transforms目录下新建一个项目文件夹,取名为你要编写的pass功能
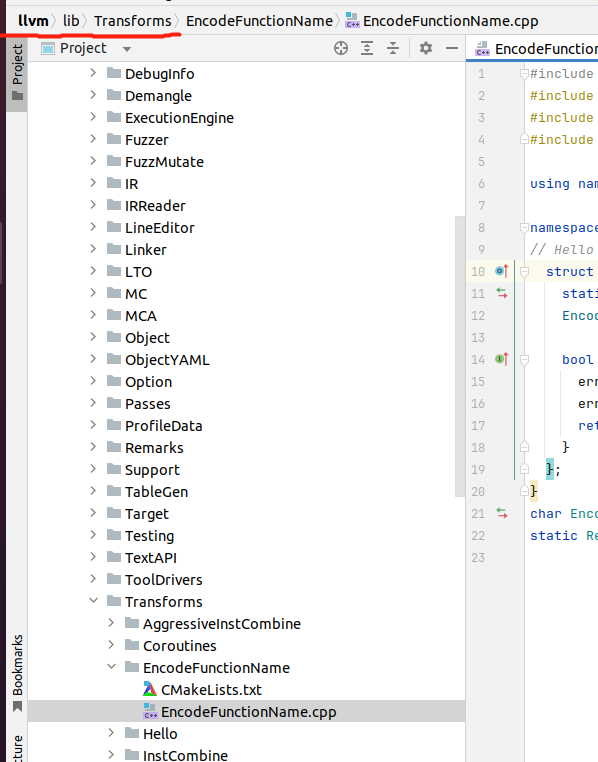
2.创一个cpp文件
如上图在pass项目文件下新建.cpp文件
EncodeFunctionName.cpp
#include "llvm/ADT/Statistic.h"
#include "llvm/IR/Function.h"
#include "llvm/Pass.h"
#include "llvm/Support/raw_ostream.h"

using namespace llvm;

namespace {
// Hello - The first implementation, without getAnalysisUsage.
  struct EncodeFunctionName : public FunctionPass {
    static char ID; // Pass identification, replacement for typeid
    EncodeFunctionName() : FunctionPass(ID) {}

    bool runOnFunction(Function &F) override {
      errs() << "EncodeFunctionName: " + F.getName() +"->";
      if(F.getName().compare("main")!=0){
        llvm::MD5 Hasher;
        llvm::MD5::MD5Result Hash;
        Hasher.update(F.getName());
        Hasher.final(Hash);

        SmallString<32> HexString;
        llvm::MD5::stringifyResult(Hash, HexString);
        F.setName(HexString);
      }
      errs() <<F.getName() + "\r\n";
      return false;
    }
  };
}
char EncodeFunctionName::ID = 0;
static RegisterPass<EncodeFunctionName> X("encode", "Encode FunctionName Pass");
可以看到这里将不是main函数的函数名取了md5的hash值。
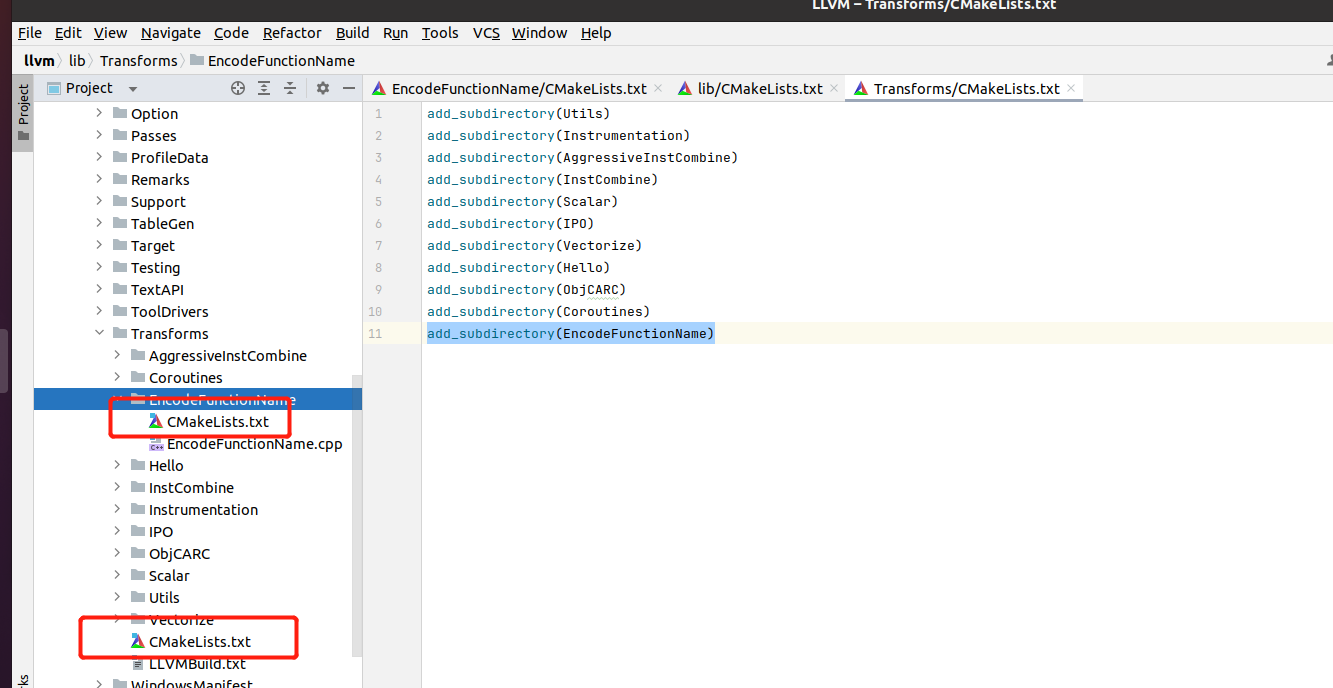
3.配置两个CMakeLists.txt
一个是在.cpp的同级目录
另一个是在Transforms目录下
如下:
add_llvm_library( LLVMEncodeFunctionName MODULE BUILDTREE_ONLY
  EncodeFunctionName.cpp

  DEPENDS
  intrinsics_gen
  PLUGIN_TOOL
  opt
  )
add_subdirectory(EncodeFunctionName)
效果
首先使用ninja编译指定的目录
yjp@ubuntu:~/ollvm/llvm-project-9.0.1/llvm/cmake-build-release$ ninja LLVMEncodeFunctionName
[2/2] Linking CXX shared module lib/LLVMEncodeFunctionName.so
然后用opt指令
yjp@ubuntu:~/Desktop/c_code$ opt -load /home/yjp/ollvm/llvm-project-9.0.1/llvm/cmake-build-release/lib/LLVMEncodeFunctionName.so -encode hello_clang.ll
WARNING: You're attempting to print out a bitcode file.
This is inadvisable as it may cause display problems. If
you REALLY want to taste LLVM bitcode first-hand, you
can force output with the `-f' option.
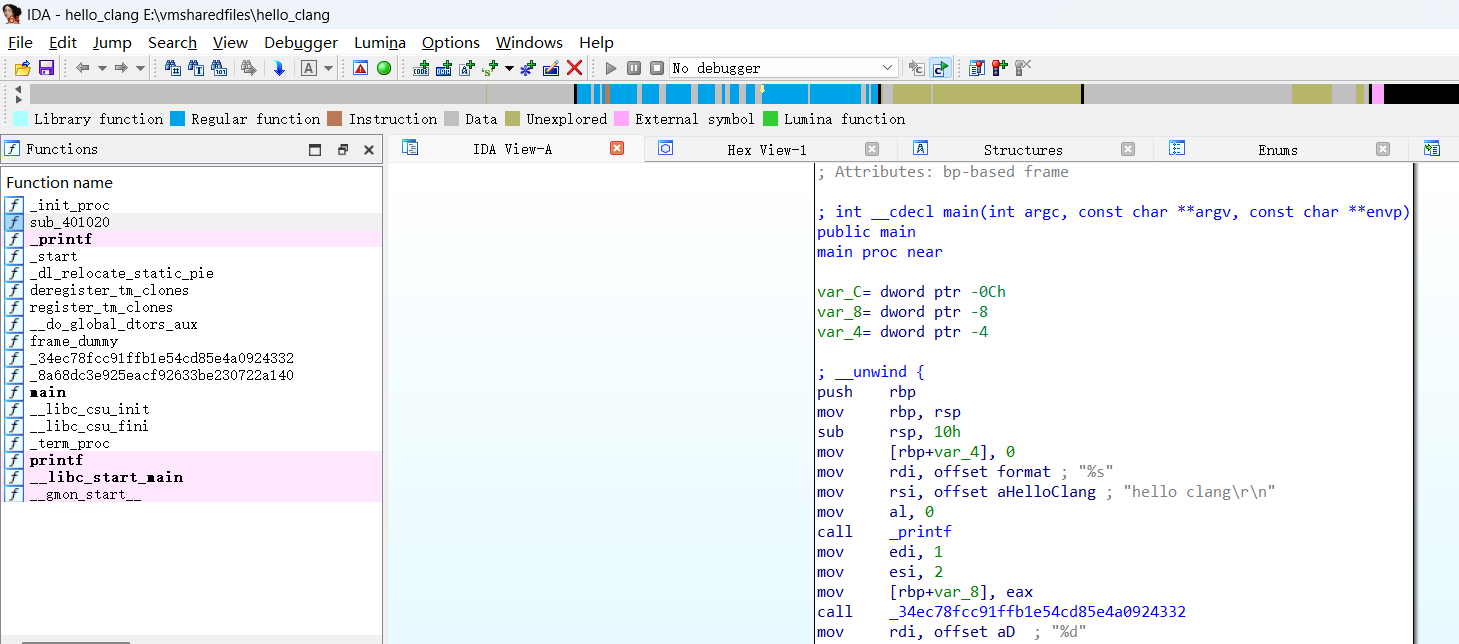
EncodeFunctionName: add->34ec78fcc91ffb1e54cd85e4a0924332
EncodeFunctionName: sub->8a68dc3e925eacf92633be230722a140
EncodeFunctionName: main->main
hello_clang.c
#include <stdio.h>
int add(int a,int b){
    return a + b;
}

int sub(int a,int b){
    return a - b;
}
int main(){
    printf("%s","hello clang\r\n");
    printf("%d",add(1,2));
    return 0;
}
通过EncodeFunctionName这个pass,把函数名改变了。
ida查看